Ragdolls are the test subjects in Ragdoll Frenzy. You can move one into a Scene, grab and reposition it, then expose it to Tools, Contraptions, Hazards, or ordinary environmental impacts. The useful way to read the system is by state: a normal ragdoll is the object you arrange, a grabbed ragdoll is being positioned, and an injured ragdoll is showing the result of an experiment. Your own Player Ragdoll Mode is separate from all three.
This distinction matters because Ragdolls are not an upgrade unit, weapon, or collectible with a confirmed stat sheet. They are repeatable physics subjects. The Roblox description presents the same broad play pattern as shooting, blasting, and grabbing dummies while using scene hazards such as slow motion and trains. The published guides confirm the interaction loop, but they do not establish a complete spawn menu, a ragdoll limit, numerical damage values, or a fixed recovery rule.
Ragdoll states at a glance
The following table groups the player-facing states and explains what each one is useful for. Treat a state as a practical label for an experiment, not as a permanent progression tier.
| Ragdoll state | What it represents | Useful action | What is not confirmed |
|---|---|---|---|
| Ragdoll | A test character for physics experiments | Grab, move, throw, attack, or place it near a hazard | The exact spawn interface and count limit |
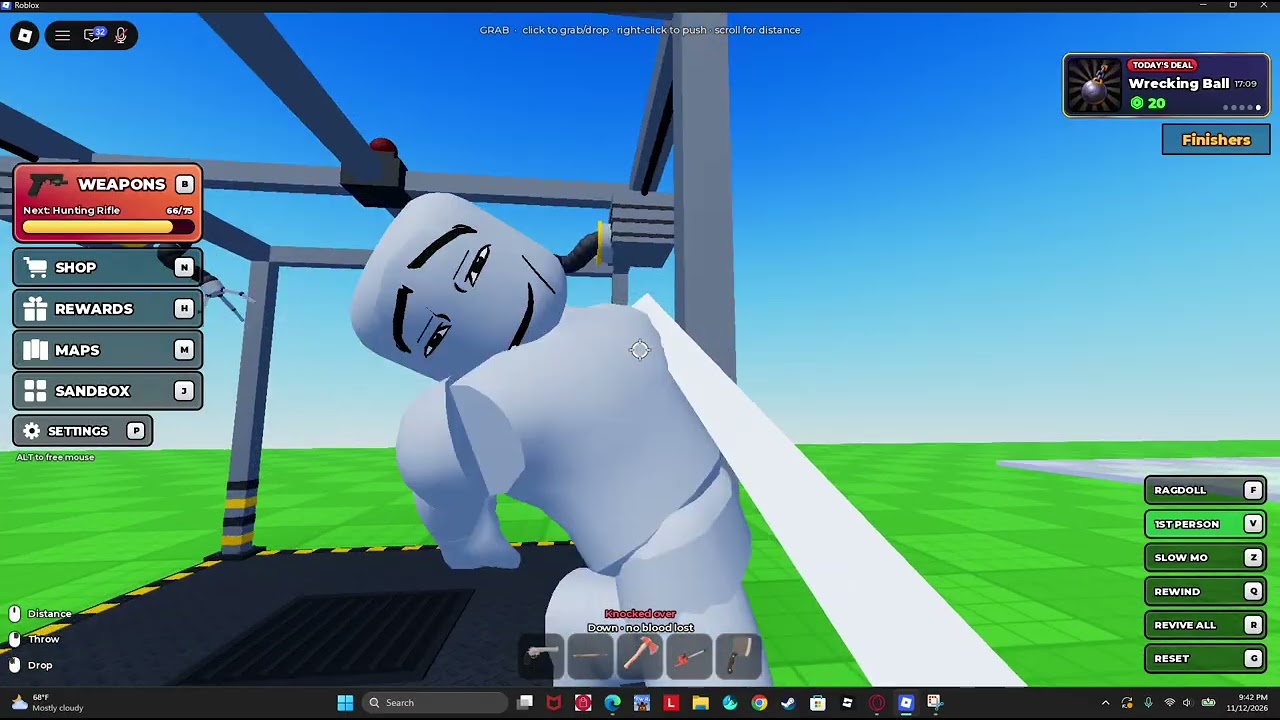
| Grabbed Ragdoll | A ragdoll currently controlled by the grab interaction | Position it beside a Contraption, flame, acid, or explosive setup | A universal placement range or timing rule |
| Injured Ragdoll | A test character with visible body-part damage | Inspect the result, then change the tool or setup and repeat | Numerical damage, health thresholds, and exact dismemberment rules |
| Player Ragdoll Mode | Your own avatar in a full physics state | Practice rolling, falling, and physical movement | It is not the same object as a spawned test ragdoll |
How to use a ragdoll for testing
- Enter an available Scene. The evidence supports using a Scene as the setting for ragdoll experiments. The exact menu wording for creating or bringing in a ragdoll is not fully established, so use the available in-game spawn or character interaction rather than relying on an assumed button name.
- Start with positioning. Move close enough to use the Grab interaction, then drag the ragdoll to an open area. Positioning first makes later comparisons easier because you can keep the subject and the hazard in roughly the same relationship.
- Choose one interaction. Begin with a Tool, a Contraption, or a Hazard instead of combining several unknown effects at once. A single change gives you a clearer read on whether the result came from an Axe strike, a moving object, fire, acid, an explosion, or the Scene itself.
- Release or throw the subject. A grabbed ragdoll can be located, released, or thrown. Use a release when you want to test a stationary setup; use a throw when you want to observe momentum, collision, or a larger physical reaction.
- Observe the body and position. Look for the practical outcome: movement, impact, visible injury, loss of a limb, being knocked away, or death. The guides do not provide a reliable universal damage number, so compare visible outcomes rather than treating one test as a fixed percentage.
- Reset the experiment. Bring in another subject or return to the available ragdoll interaction, then change one variable. Repeating the same setup with a different position or tool is more useful than stacking every hazard immediately.
The order is important. Grab and placement come before damage testing because a ragdoll that starts beside a device will produce a different physical sequence from one that is thrown into it. Momentum, contact angle, body position, and timing can all change what you see. Once the target is staged, the Tools guide helps choose a single interaction for the comparison.
Ragdolls, tools, and hazards
Ragdolls work as the common target for several kinds of interaction. Tools provide direct contact: the evidence specifically identifies Axe experiments, including attacks directed at the head or limbs. Contraptions provide a setup with a mechanical or environmental interaction. The supplied examples include arrangements that can pull at or remove arms, while a grabbed head can be used as the next point of manipulation.
Use a contraption to test ragdoll body-part effects
This moment supports the contraption examples by showing a setup that pulls at a ragdoll's arms before grabbing its head.

Hazards are broader area or environmental tests. Fire and acid are explicitly supported examples, and Nuke is identified as a high-intensity hazard for large-scale destruction. Barrels can also be moved and combined with a setup. These examples are useful categories rather than a promise that every Scene contains every object.
Place a ragdoll in acid to observe hazard results
This moment supports the environmental-exposure examples by describing ragdolls being put in acid before contraptions and other ways they can die.
Use the categories to choose a test goal:
- Direct damage: use a Tool when you want to see how a close attack affects a selected body part.
- Mechanical interaction: use a Contraption when the point is to place the ragdoll into a repeatable device or moving arrangement.
- Environmental exposure: use fire or acid when you want the subject to remain in contact with a hazard and observe the resulting injury.
- Large disruption: use Nuke or another powerful Hazard when you want to compare how distance and placement affect a wide physical event.
- Collision and momentum: move or throw the ragdoll, a Barrel, or another available object before contact to test how motion changes the result.
Do not treat these categories as a ranked damage list. The guides confirm that they are ways to interact with ragdolls, but they do not publish a stable order of effectiveness or a universal one-hit rule.
Grabbed ragdolls and stable setups
Grab is the most useful preparation step because it turns a loose target into something you can deliberately stage. Pull the ragdoll away from clutter, choose the contact point, and place it near the intended object. If a setup uses a Barrel or another movable item, position the item separately before starting the damaging interaction. This makes it easier to tell whether the result came from the ragdoll's initial momentum or from the device.
For repeatable comparisons, keep three things consistent: the Scene, the approximate starting position, and the selected body area. Then change only the tool, hazard, or release method. If you are comparing environmental effects, use the Hazards guide to keep fire, acid, and other dangers separate from the target setup. For example, you can place the ragdoll near acid once, then repeat with fire, and finally compare a direct Axe hit. This does not produce official damage statistics, but it gives you a useful practical comparison inside the physics sandbox.
Throwing is better when you want to test movement than when you want a clean damage comparison. A thrown ragdoll may strike several surfaces, rotate, or leave the intended area before the main effect occurs. If the result is difficult to interpret, return to a grabbed or stationary setup and repeat it with less momentum.
Injured ragdolls and reading results
An injured ragdoll is a result state, not a separate character class. Check which body parts are visibly affected and whether the subject remains movable, loses a limb, is knocked down, or dies. The physics guide supports inspecting body-part condition, but it does not supply complete thresholds or a numeric health display that applies to every source of damage.
That limitation changes how you should record an experiment. Write down the interaction and the visible outcome rather than claiming that a tool always causes a particular percentage of damage. If a ragdoll survives, try the same placement again before concluding that the object is ineffective. A different angle, distance, or contact sequence may have changed the result.
Death is also an endpoint for the current test, not proof that the same setup has a fixed guaranteed outcome everywhere. Scene geometry and physics can alter how a ragdoll reaches a hazard. When you need a fair comparison, avoid adding a second hazard until the first test is complete.
When a result looks unusual, classify it before repeating it. A ragdoll that stays still may be outside the effective contact area; one that flies away may have received momentum without sustained exposure; and one that loses a limb has provided a visible body-part result even if it does not die. This simple classification helps you choose the next test: reposition for missed contact, reduce throwing for a momentum-heavy result, or repeat the same placement to check whether the injury is reproducible.
Player Ragdoll Mode is different
Player Ragdoll Mode applies to your avatar. The controls guide identifies G as the toggle for entering the player's ragdoll mode, which is useful for practicing rolls, falls, and other physical movement. It should not be confused with the ragdoll you place in a Contraption or expose to acid.
The two systems can appear in the same experiment: you can manipulate a test ragdoll and use your own ragdoll mode to move through the Scene. They still have different roles. The test ragdoll is the subject whose body and position you observe; Player Ragdoll Mode changes how you control yourself. If you are trying to diagnose a target's injury, first make sure you are observing the target rather than your own avatar's physics state.
What the evidence does not establish
Several common questions remain deliberately open. The published guides do not confirm a full list of ragdoll variants, a numerical health or damage model, a fixed number of simultaneous ragdolls, a universal spawn-screen sequence, or a guaranteed method for restoring every injured subject. They also do not establish that keys and doors mentioned in other Scene notes are required for the ragdoll system.
Use the current Scene and its visible interactions as the authority for those mutable details. If the game presents a different spawn control, available object, or reset behavior, follow that current panel rather than assuming that every Scene has identical tools. The stable takeaway is the workflow: create or bring in a subject, grab and place it, apply one interaction, inspect the physical result, and repeat with a controlled change.
Ragdoll Frenzy Ragdolls FAQ
How do I use a ragdoll in Ragdoll Frenzy?
Enter an available Scene, bring in or create a ragdoll through the current in-game interaction, then use Grab to move it near a Tool, Contraption, or Hazard. Release or throw it and observe the physical result.
What is the difference between a ragdoll and Player Ragdoll Mode?
A ragdoll is the test subject you position and expose to hazards. Player Ragdoll Mode affects your own avatar; the controls guide identifies G as its toggle.
Can I get exact ragdoll damage numbers?
The published guides do not establish universal health, damage, or dismemberment values. Compare visible body-part damage and the final physical outcome instead, keeping the Scene and starting position consistent.
Which interactions can affect a ragdoll?
The supported examples include grabbing, throwing, Axe attacks, Contraptions, fire, acid, Barrels, explosions, and Nuke-style hazards. Availability can vary by Scene, so use the objects currently shown in the game.